Up to date as of 11/2022
Generic items are items that don't need to be brand specific and have a similar nutritional profile no matter where you purchase them from. Examples are produce, dairy items like milk or cheese, spices, beans, etc. Generic items may be added manually to your Item Database via a generic database search or they can get imported during the initial onboarding process. Most districts will be able to import the generic items they purchase and have access to year round, but many seasonal items that are purchased or commodity items that are received at different times throughout the year might need to be manually entered via a generic database search. Below are the instructions for adding a generic item to the local item database manually via a search of the generic database:
The example we will use is raw, fresh strawberries purchased from a local produce vendor in 8/1 lb clamshells
- Log in
- Click on the Item Database
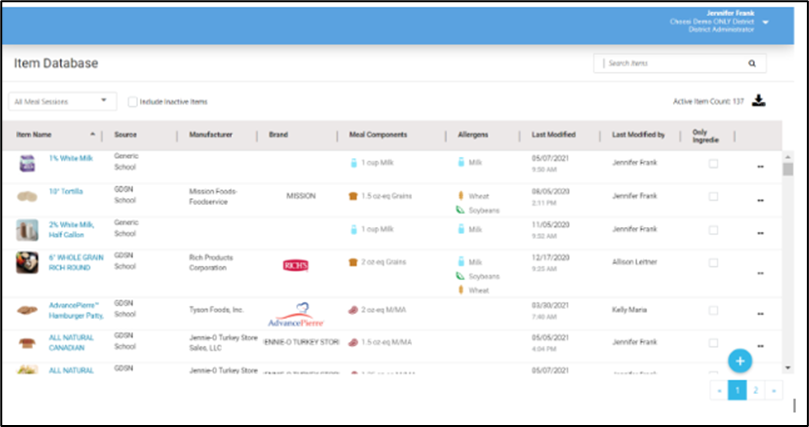
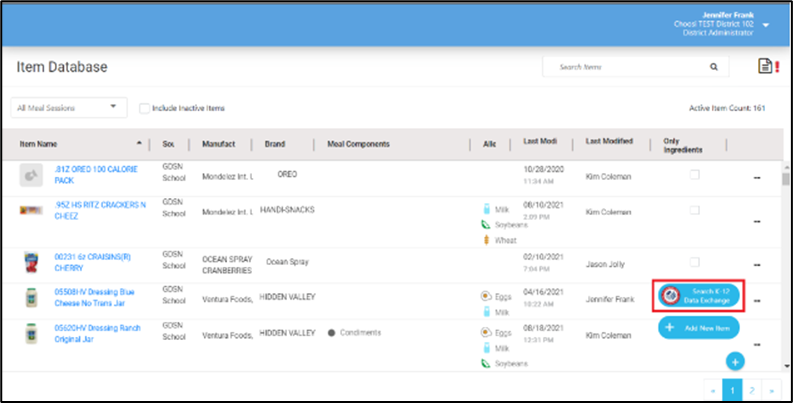
- Click the plus sign button and select Search N2F Database button
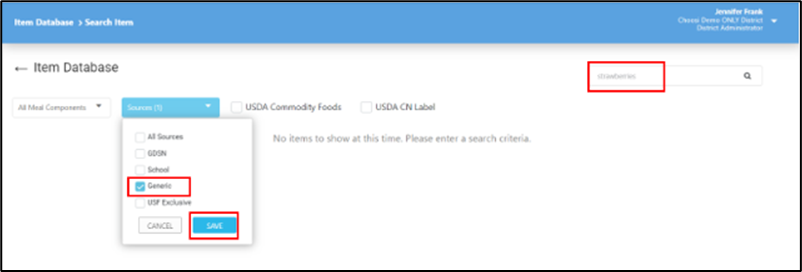
- In the keyword search box, enter your search term (ex: strawberries) and use the filters to filter for the Generic database. Click the save button to initiate the search of the Generic database
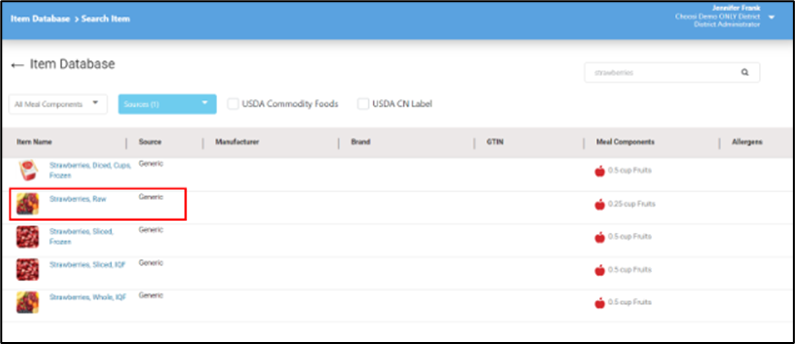
- Select from the results the closest match to the product you're adding to your Item Database. In this example, the strawberries are not frozen and they are raw so the Strawberries, Raw is the best selection
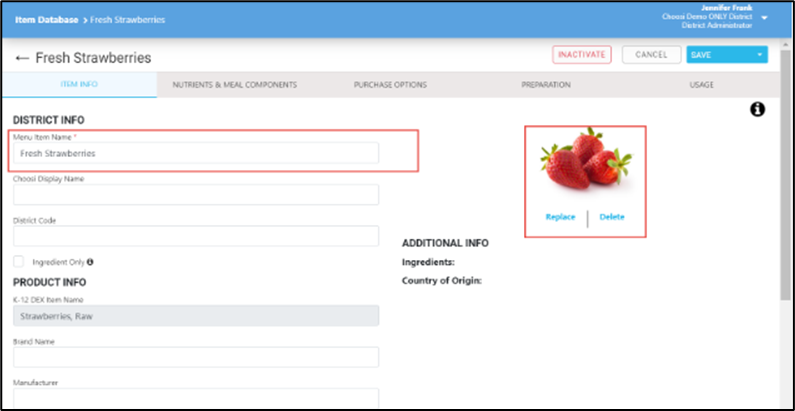
- Make any necessary edits to the Item Info tab such as adding an image for the item and editing the item name to reflect how you'd like this item to display on menus
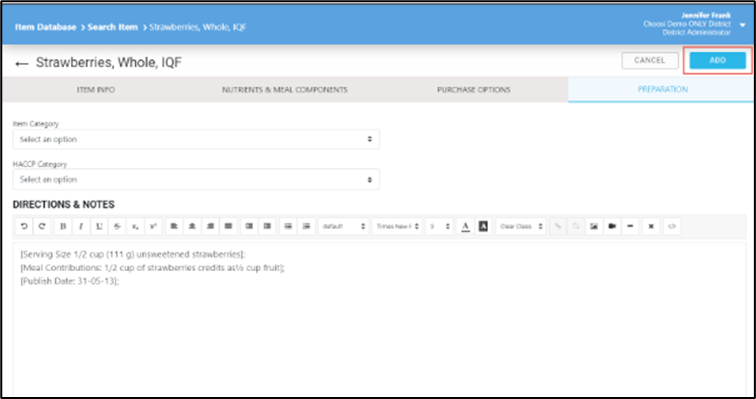
- Scroll through the remaining tabs and enter any additional information to be stored with this item that you'd like. When ready, click the Add button to add this item to your Item Database Note that you can't add Purchase Options to this item until it's been added to your Item Database
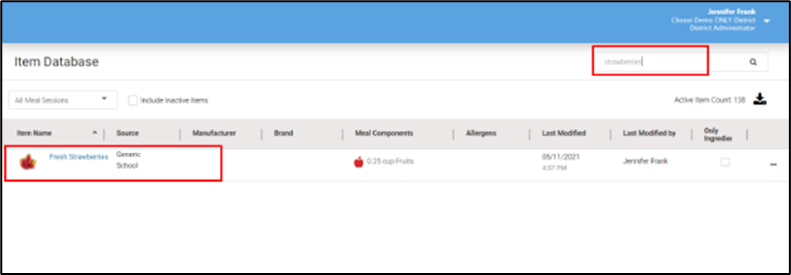
- Now, search your Item Database for the item you just added and click on it
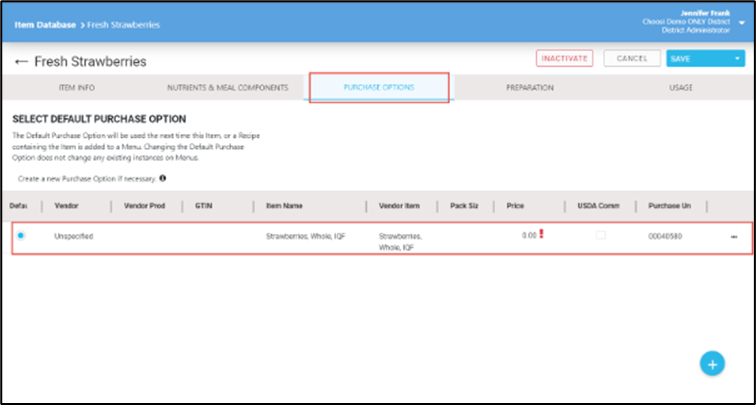
- Click over to the Purchase Options tab and click on the existing purchase options template to edit it
- Note that there may be more than 1 existing purchase unit option to choose from or no purchase unit option templates available in which case you'll need to click the plus sign button and choose Custom Defined to setup from scratch. The template provides you with some pre-filled data to make the process of setting this purchase unit up more streamlined
- Note that there may be more than 1 existing purchase unit option to choose from or no purchase unit option templates available in which case you'll need to click the plus sign button and choose Custom Defined to setup from scratch. The template provides you with some pre-filled data to make the process of setting this purchase unit up more streamlined
- Select the vendor you purchase this item from from the drop down list and enter the following information as provided by your vendor or used internally:
- Item Name - this is how you want this item to be named for the purposes of Inventory management
- Vendor Item Name - this is the item name how it appears on your bid and how you order it
- Pack Size - this is the size of package you purchase as provided by your vendor
- Vendor Product ID - this is the code for the item you use when ordering this item from your vendor
- District ID - if your district has an internal number system for items, enter that here
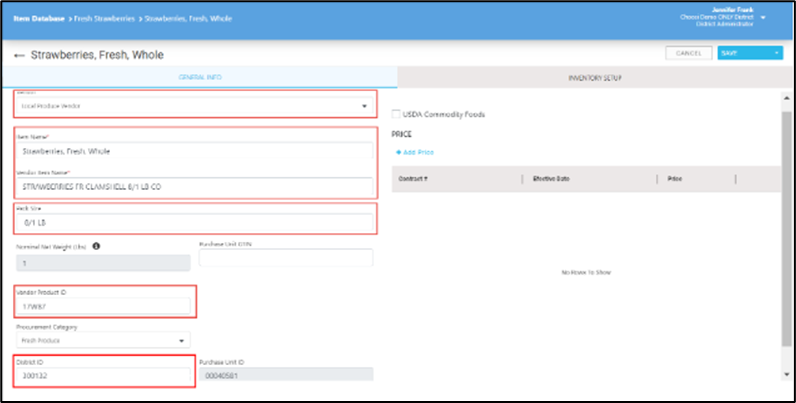
- Click the Save button on the top right hand side of the screen
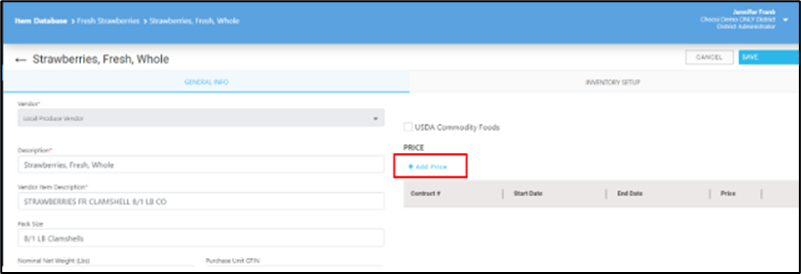
- Click the Add Price button to add a price to this item
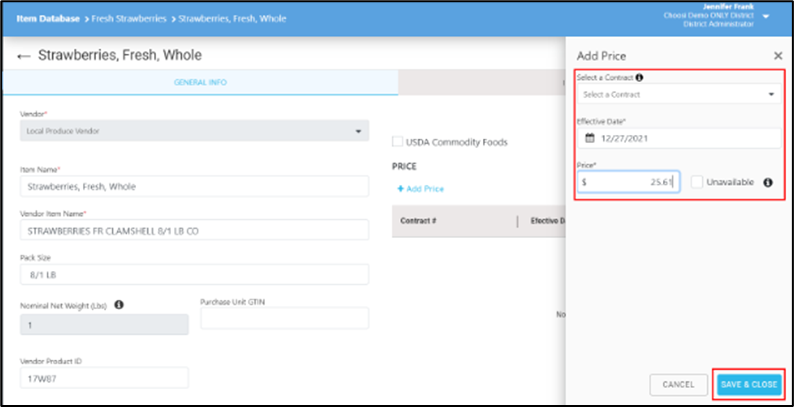
- Select a contract number from the drop-down menu (if applicable) and enter an effective date for the pricing as well as the price. Click the Save & Close button when the pricing information is as desired
- Now, click over to the Inventory Setup tab
- In this example, the fresh strawberries come per case with 8 1 LB clamshells. Change the Purchase Unit and Inventory Unit to reflect how you purchase the item using the drop down menus. Enter a net weight for the case and Inventory Units in a Purchase Unit.
- Note that when a net weight is entered, the # Servings in One Purchase Unit automatically calculates. This calculation is consistent with the food buying guide for the generic item
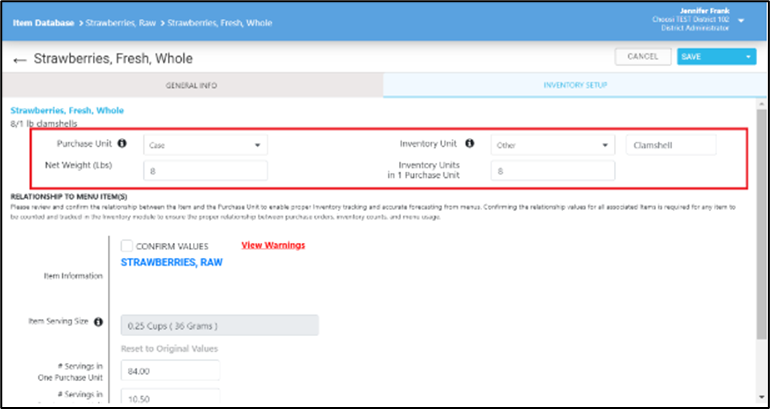
- Note that when a net weight is entered, the # Servings in One Purchase Unit automatically calculates. This calculation is consistent with the food buying guide for the generic item
- Review all data for correctness and view any warnings. When satisfied, click the Confirm Values flag to make all inventory data for this item Read-Only
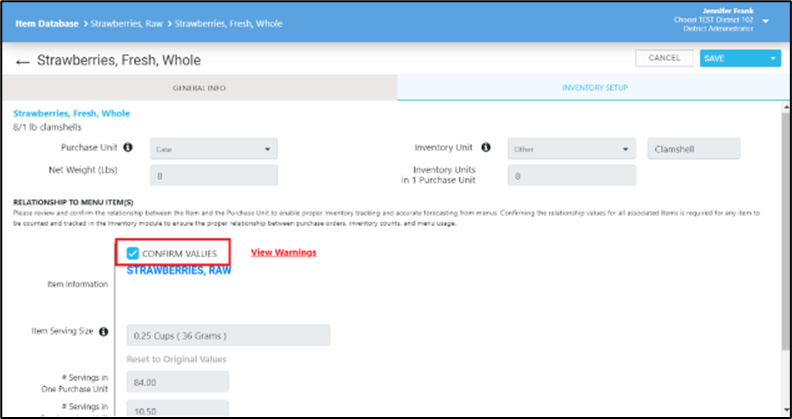
- Click the drop down arrow next to the Save button, select Save & Close, then click the Save & Close button to save this purchase unit and close out this purchase unit detail page
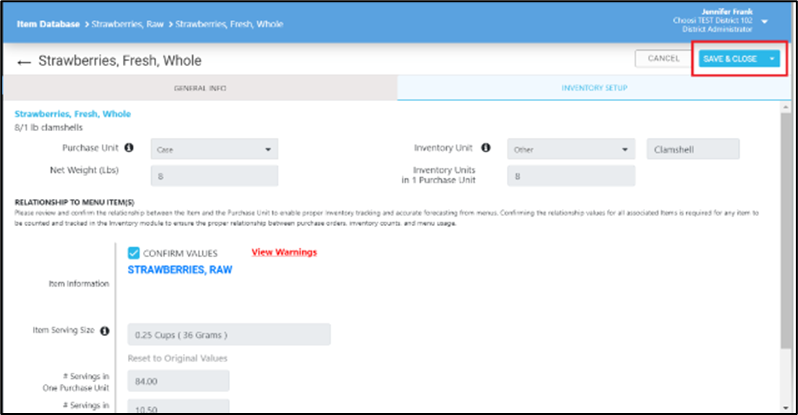
- Once returned to the item from the Item Database, click the drop down arrow next to the Save button, select Save & Close, then click the Save & Close button to save this item and close the item detail page
